Friday, September 7, 2012

Green Chile Chicken Enchiladas

I think we can all agree that there is very little point to eating any kind of diet lifestyle if it means that enchiladas are suddenly off the menu.  Unlike sugar-coated chocolate caramel cake nobs that are, by design, for the strict purpose of building fat asses, enchiladas are sufficiently flexible to modify for most eating plans, except for strict paleo.  The mantra for this recipe is this:


No. Corn.  More specifically, no corn tortillas.  But, Adventure Cooker, what about organic corn tortillas? To which I would reply that genetically modified corn seeds grown organically are still genetically modified and therefore unfit for healthy lifestyle food consumption.  I could go on and on with the damage done to our American food supply by the propagation of GMO seeds, but I'll leave that to the food supply conspiracy theorist folks.  Besides the risks of GMO foods being largely unresearched and therefore unreported, corn is also a huge source of starch and sugar that the body doesn't need if the expectation is for it to function optimally.  Corn and cake belong in the same category: very rarely, if at all.  

Allergen Notes: Dairy
Lifestyle: Clean Eating, Gluten Free, Lacto-Paleo (with modification)

Green Chile Chicken Enchiladas
1 rotisserie chicken, boned and chopped
12-16 ounces of shredded sharp cheddar cheese
1 1/2 cups quinoa flakes
1/2 onion, chopped
Green chile sauce

Green Chile Sauce
16+ ounces of roasted, chopped green chile
1 cup chicken broth
3 TBSP arrowroot powder
1 TBSP coconut oil
1/2 onion, finely chopped
1-2 tsp ground cumin (this is a to-taste kinda thing)
1 tsp garlic powder
1/2 tsp salt
1/2 tsp oregano

Preheat the oven to 350F. 

To make the sauce, heat a sauce pan with coconut oil.  Add the chopped onion and cook until starting to look translucent.  Add the green chile, chicken broth, cumin, garlic powder, salt, and oregano.  Bring to a boil, reduce the heat, and let simmer for 20-30 minutes.  Mix the arrowroot powder with 1/4 c - 1/2 cup of cold water (or cold chicken broth).  Bring the chile sauce to a rolling boil and whisk in the arrowroot powder to thicken the sauce.  Be judicious to not over-thicken because, unlike corn starch, arrowroot powder can make your sauce into a pudding by overuse.  Once thickened, remove from heat.  

Spray a 9x9 inch baking pan with oil.  Sprinkle 1/2 cup of quinoa flakes on the bottom.  Place layer of chicken, and top with chopped onions and a generous portion of cheese.  Ladle green chile sauce over cheese and chicken, and repeat the next layer: quinoa flakes, chicken, onions, cheese, and chile.  Top with remaining quinoa flakes.  

Cover and bake for 30-45 minutes. Let stand for 10 minutes before serving. 


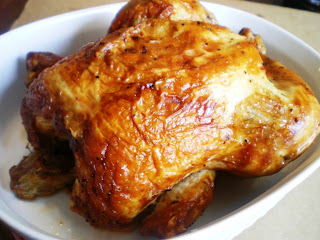
Now, let's spend some time reviewing the ingredients list, starting with the chicken.  If you are truly into the know-where-your-food-comes-from crowd, then find yourself one of these: 


 And, turn it into one of these:


Or, just buy one from the store.  A lot of times I will buy a whole roaster and cook it myself, but more often than not, since time is often a commodity, I'll buy a rotisserie chicken from the store.  Here's the thing about chicken: Vegetarian fed chickens are nice and non-hormone and non-antibiotic treated vegetarian fed chickens are even better.  But, what all those lack are the natural vitamin and mineral content of a chicken that is pasture raised on a normal diet for chickens.  Vegetarian fed usually means corn and soy, which, as we all know from corn fed cows, makes for a fat chicken but one with very little nutritional value.  Finding pasture raised chickens is tricky, not to mention expensive, so most of us will have to content ourselves with our best available commercial options.  
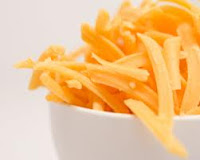
 
Cheese.  SHARP cheddar cheese.  Sharp cheddar and green chile are together a combination fit for the palates of royalty, which is to say, you.  Since awareness is 90% of the cooking and eating battle, cheese is a perfect example of how to start learning to exercise awareness.  Read the labels:  Orange cheeses are food dyed that way, so check to make sure your cheese is dyed with anatto and not a chemical yellow food dye.  If you are trying to stay completely dye free, look for naturally white sharp cheddar.  Also, check for labeling that ensures the cheese was made from cows not treated with rBST.  One last word on cheese, give strong consideration to shredding the cheese freshly from a block.  Commercially packaged pre-shredded cheese is coated with a silicate to prevent the cheese from clumping and sticking together.  Since we don't eat the silicate packets from our vitamin bottles, I would also suggest you shouldn't be eating food-grade silicate that coats pre-shredded cheese.  


The chopped onions in this recipe was an idea I took from the enchiladas served at the Golden Pride restaurant in Albuquerque, NM.  Because the onions don't cook through during the baking process, there is this bright textural crunch that heightens the enchilada experience.  The trick here is to not overuse the onions.  You just want a noticeable sprinkle on each layer, nothing more.


While I grant that some may thing that quinoa flakes are a poor substitute for corn tortillas, I will put forward that they do one thing much better and that is add a richness and flavor to the enchiladas that far surpasses anything a corn tortilla can do.  I'm sure there are loads of quinoa flake brands out there, but this is the brand I have access to and I've been very happy with it.

By omitting the quinoa all together this recipe could qualify as a lacto-paleo recipe, meaning it fits within the paleo paradigm for those paleo eaters who are still consuming portions of dairy.  Whether or not you could still call it an enchilada at that point is a matter of some debate.


During chile season there is no reason at all why you shouldn't be buying your chile pods fresh and roasting them yourself for the purpose of making your own sauce.  However, since we here at Adventure Cooker Cooking respect the noose of time constraints using frozen chile will also work.

I'd discourage buying pre-made sauce for two reasons: corn starch and sodium.  By making the sauce from scratch you are controlling all the secondary and tertiary contributions to its make up that allow this meal to be considered a healthy part of the recipe rotation or just a salt-packed, corn by-product, gut-inflaming indulgence.

Bake these enchiladas in a covered glass or ceramic dish for 30-45 minutes.  After they come out of the oven, let them stand (still covered) for 10 or so minutes before cutting in and eating them.  Pair this with some amazing guacamole and a blisteringly cold pinot grigio.  Enjoy! 

Red Wine Beef Short Ribs


I say, "SHORT RIBS!" You say, "DEAD COW!"  SHORT RIBS! >DEAD COW!< SHORT RIBS! >DEAD COW<! YAAAAY!!!  That is going to be our cheer for this recipe, so break out your pom poms and your glitter eye shadow and get ready for some melt-in-your-mouth beefy goodness.

Allergen Notes: None
Lifestyle: Paleo, Clean Eating

Red Wine Beef Short Ribs
3 lbs boneless short ribs (or 4 lbs bone-in short ribs)
1 large onion sliced thin
4 small turnips peeled and cut into your preferred size of chunks (not too small, though, or they'll dissolve during the cooking process). 
4 stalks of celery cut into thick slices
8 ounces of whole baby brown mushrooms (sometimes called pearls)
6 ounces of small/thin baby carrots (actual baby carrots would be awesome, but the commercial kind work, too)
1 cup dry red wine (not cooking wine, actual drinking wine, please)
1 cup beef broth
1 TBSP coconut oil (or olive oil)
3 tsp fresh thyme (or 1 tsp dry)
1 tsp garlic powder
1/2 tsp mustard powder
salt
pepper

1. Spray the crockpot with some manner of spray oil, largely to help with the cleaning process later. 

2. Prepare the vegetables, keeping the onions separated from the rest. 

3. Heat a large frying or griddle pan with the coconut oil until the oil is almost smoking (smoke point of unrefined coconut oil is around 350F). Generously salt and pepper the ribs and then brown the short ribs on all sides. 

4. Place the first round of ribs in the crockpot and top with sliced onions and some of the veggies. Repeat this layering process until all the beef and veggies are in the crockpot.  

5. Mix together the red wine, beef broth, thyme, garlic, and mustard powder.  Pour over the ribs and vegetables.

6. Cover the crockpot and cook on low for 8 hours, or on high for 6 hours.  


Beef short ribs are a relatively inexpensive cut of meat that come from, y'know, a cow.  Specifically, they are cut from the rib and plate primals of the animal. 

If you happen to have recently acquired an elk or deer recently (I'm looking at you, Jerry and Melissa), I'm guessing that venison or elk would work just as beautifully in this recipe as beef.  I am completely uneducated at cooking with game meat, so I can't make a serious recommendation on which cut of the animal would work best.  My initial guess would be to suggest using a roast chunked up so it would cook up like stew meat.  


For our purposes, we are using boneless short ribs because they were on special at my local grocery store, but bone-in would work just as well, and would likely create a richer, beefier output as the marrow from the bones cook into the broth and vegetables.  You can read everything you'd care to know about short ribs here.  The plan here is to slow cook these in the crockpot, so go dig yours out of storage, or lift it off its gilded pedestal (which is where mine is kept).  


Next, find your griddle pan or frying pan.  To get the best searing effect, I like to use either a heavy cast iron skillet or my ribbed griddle pan.  I got mine from IKEA for $15.   But the bigger question is WHY use a ribbed griddle pan? So we can get hoity-toity grill marks on our meat, that's why.  Heat this pan up with some oil in it until the oil is just about smoking.  It needs to be plenty hot so when the meat hits the surface it immediately sears. We want to sear the outside without cooking the inside.  

Generously salt and pepper the beef.  


Line up your vegetables and crockpot, um, crock so the assembly process can go smoothly.  Everything is there: Onions, mushrooms, carrots, and chopped up turnips and celery.  As a note, you could replace the turnips with rutabagas or even parsnips if you wish.  For a very hearty fall-tasting final product use all three root vegetables along with the others listed in the recipe.   


Now, BEGIN! 


Lay only a few pieces of beef into the hot pan at a time, searing the meat in batches.  If you overcrowd the meat then it'll steam, not sear.  Keep at least 2 or more inches between each piece of meat to avoid making the steam versus sear mistake.  And, if you have a ribbed griddle pan then lay the meat at a diagonal to make an even hoitier-toitier set of sear lines.   After about 90 seconds on one side, turn over and brown each of the four available sides.  


See?! How awesome is that.  It almost looks like something you'd see on a cooking show! Only, YOU did it! In YOUR kitchen! 


Lay this first set of ribs in the crockpot and top with a generous amount of onions and then its your discretion how many vegetables you want to lay in.  I strongly encourage layering meat and vegetables so both get to take advantage of each other's benefits.  The produce will soak up all that beautiful beef flavor, and the beef will get seasoned beautifully by the vegetables.  If it's all meat on top and veggies on the bottoms (or vice versa) then you'll end up with bored ribs and mushy depressed vegetables. And, a mushy depressed vegetable can really ruin a person's day.  


By the time all the meat has been seared, you should end up with a pretty full crockpot that looks something like this: 


Pretty, don't you think?  I think so, too.  But before we get all chest puffy we need to add our spices and red wine.  Slow cooking beef is a marvelous smell, but slow cooking beef in red wine is especially marvelous.  Pick a drinking wine to cook with instead of cooking wine.  Cooking wine is more vinegar than wine to preserve its shelf life.  Uncork a nice pinot noir, cabernet sauvignon, or burgundy for this recipe and you'll still have enough to drink with dinner.  Alternately, buy a four pack of small bottles and you've got  four one-cup pre-measured servings, which is nice for cooking, but less nice if you're hoping to have something to swill later.  Note: if you don't have any red wine handy, any fortified wine will work like cognac or brandy, just be aware that if you're eating the Paleo lifestyle that the only compatible alcohol materials are wine and tequila.  

Now. Let's talk about broth for a moment.  

 The common thought is that buying organic broth is best, which is true, but there is a lot more to consider, especially when buying beef broth.  For our gluten free friends, most commercial beef broths have MSG and there are even some organic brands that use MSG, too.  Once you find a non-MSG-using beef broth, you'll still want to read the label because Pacific Rim uses evaporated cane juice in theirs, and Swanson Organics uses refined sugar in theirs! If you can't make your own beef broth from scratch then take the time to be super picky to find an organic beef broth that a) does not have MSG; b) does not use sugar or other sweeteners; and, c) does not have any added food dyes.  As you can see, the closest to the beef broth trifecta that I could find still has organic caramel coloring, which won't work for those who are working hard to stay dye free.  But, for my family the lack of MSG and sugar was more important.  

Mix together the broth, wine, and spices and pour over the beef and vegetables.  Cover and cook on the low setting for 8 or so hours, or on high for 6 or so hours.  The final product will be meat that is forkable, falling apart at the slightest touch, soft aromatic vegetables. Yum.    

Sunday, August 26, 2012

Orange Date Spinach Salad

For our first attempt at recipe sharing want to start slow and simple. This salad I came up with when I was, frankly, bored of the usual dinner salad of lettuce, cucumber, raddish, bell pepper, and tomato.  Salads are dynamic, flexible, and sometimes don't involve lettuce at all.  Just look at these Jell-O salad recipes, or flip through any church members cookbook of the last 10 years or more.  My husband once piled no less than 4 kinds of meat onto one plate and declared it a salad.  But, I digress.  This is fairly light, although robust in textures, and is one of my favorites for pairing with just about any meal.

Allergen Notes: Tree nuts
Lifestyle: Vegan, Vegetarian, Clean Eating, Gluten Free

Orange Date Spinach Salad
1 1/2 c. baby spinach
20 dried dates, sliced
1/2 red onion sliced thinly
1 10.75oz can mandarin orange segments
1/2 c. pecan halves
4 TBSP roasted walnut oil

Layer spinach, dates, onion, oranges, and pecans.  Drizzle with walnut oil. 


Makes 4 salads. 

Prep time: 15 minutes
Cook time: 0 minutes
Plating time: <10 minutes

We'll collect our ingredients and get them into the assembly line before we put everything together.   I like to assemble my salads on their individual plates to maximize presentation potential.  And, because it niggles my righteous sense of meal time pageantry to have all the pretty parts of the salad end up on the bottom of the salad bowl. 


Every salad needs a base and most bases are green in nature.  This salad is no different.  Fresh spinach is a marvelous, inexpensive thing. Baby spinach even more so, because it comes in those marvelous little five ounce plastic boxes that say "Triple washed and ready to use!" on them.  The spinach is edible and the boxes are recyclable! It's a win-win no matter which way you look at it.  

One small handful of spinach leaves per salad should do it, say approximately 3/4 cup.  


Next, find yourself some nice dried (but not desiccated into rigor motoris), unsweetened dates.  Only recently have I come to appreciate the date and its usefulness in cooking, snacking, and using as dummy cockroach bodies.  

About 4-5 dates or fewer per salad is all you need.  Slice them into sections like you would slice a green olive to show the red pimento center.  


Next, we want some mandarin oranges.  We are looking for are the canned variety, more specifically those canned without using high fructose corn syrup, sorbitol, or other additional sweeteners.  Or, canned in syrup.     Fruit packs a fructose punch as it is without throwing in added glucose and other sugar sources.  We want to have a salad, not a blood insulin spike.

A 10 ounce can of mandarin oranges packed in mandarin orange juice is going to have about 12 g of sugar per serving, and the amount we are using per salad is going to give you <1 gram.  Even still, it's best to stay aware of what you're buying.  Native Forest sells a very good mandarin orange.  


Red onions! What, you say? Red onions?  Yes.  Red onions.  We want thin thin slices, since we want them for texture and flavor and not for ruining any make out sessions you may have planned later after dinner.  


Now go find yourself some fresh pecans.  Raw or roasted makes no matter, but what does matter is that they are NOT salted.  Remember: NO SALT.  

I buy pecan halves and then do a rough chop, although sometimes I leave the halves un-accosted.  If you hate pecans or have an allergy, you could use walnuts or even macadamia nuts.  I didn't really like the taste of almonds in this salad, personally. 


The salad dressing is nothing more than a very light drizzling of roasted walnut oil.   This is my favorite brand and I've found it at most major grocery stores as well as Whole Foods, Sunflower Market, and Vitamin Cottage (a.k.a., Natural Grocers).  

The order of events should unfurl as follows:

Spinach on the bottom.  Date pieces sprinkled artistically on top of the spinach followed by 2-3 thin red onion rings (or 4-6 thin red onion ring halves).  2-3 ounces of mandarin orange segments next.  Pecans sprinkled on top.  Drizzle with 1 TBSP (or more depending on how much you want) of walnut oil.  At this point, you can start cramming it in your cake hole.

Adventure Cooker Cooking

Welcome, friends.  Here is the future of cooking! Cooking with options.  I view eating as a lifestyle, and not a diet practice.  Most of us have heard that phrase at one or another time in our adult life: It's NOT a diet! It's a lifestyle.  But, what happens when your lifestyle impacts your food options in frustrating ways?  How do you modify your recipe deck to accommodate your new lifestyle?

We here at Adventure Cooker Cooking For People Who Want to Eat Good (and Feed People Good Things, Too) have the solution. Each of our recipes will be laid out in its entirety, and categorized into the eating lifestyle that it suits best.  But, here's the delicious part: Every recipe will also involve modifications that allow it to flexibly adapt to another dietary lifestyle.  Gluten-free, clean eating, Paleo, South Beach, Atkins, vegetarian, vegan, and so on will all have spots at our table.  

Cooking is an adventure! Having recipes that are already adapted to your style of eating is awesome, but having recipes that are adapted to several ways of eating give unprecedented options to those of us who are trying to keep our cooking chores within the realms of sanity without giving up flexibility.

I'm the Adventure Cooker.


Pack your little bag of spices and join me.